
How to Resize your Corporate Headshot
Ok so now you have your corporate headshot, now what? At The Digital Picture Company we focus on corporate event photography and Headshot Photography. One of our most asked questions when one gets their Headshots electronically delivered is, “how do I upload my Headshos to websites like Linkedin? or “I just received a request from an event organizer who needs my headshot but they need a certain size, what do I do?” . This post will go through how to resize images in both Mac and Windows and I’ll have additional information on the requirements from the most utilized websites.
Typically, you will have your image file sent as a JPG file format. This is the standard format you would receive from us or from your photographer. If not request your images in JPG. Next is the file size. This is all about the Pixel Size, I recommend the bigger the better, 2400 x 3000 (you can print an 8x10 at this size). It is so much easier to downsize to fit requirements and ensure sharpness of the image. I’ve seen way too many examples of pix-elated images due to how the image was too small to begin with.
Here are instructions on resizing:
How to resize your image in Windows.
1. Open your headshot in Windows Photos.
2. On the upper far right you will see 3 dots, That’s the see more icon, click on it

3. Click on Resize Image.
4. A pop up window will show resize image
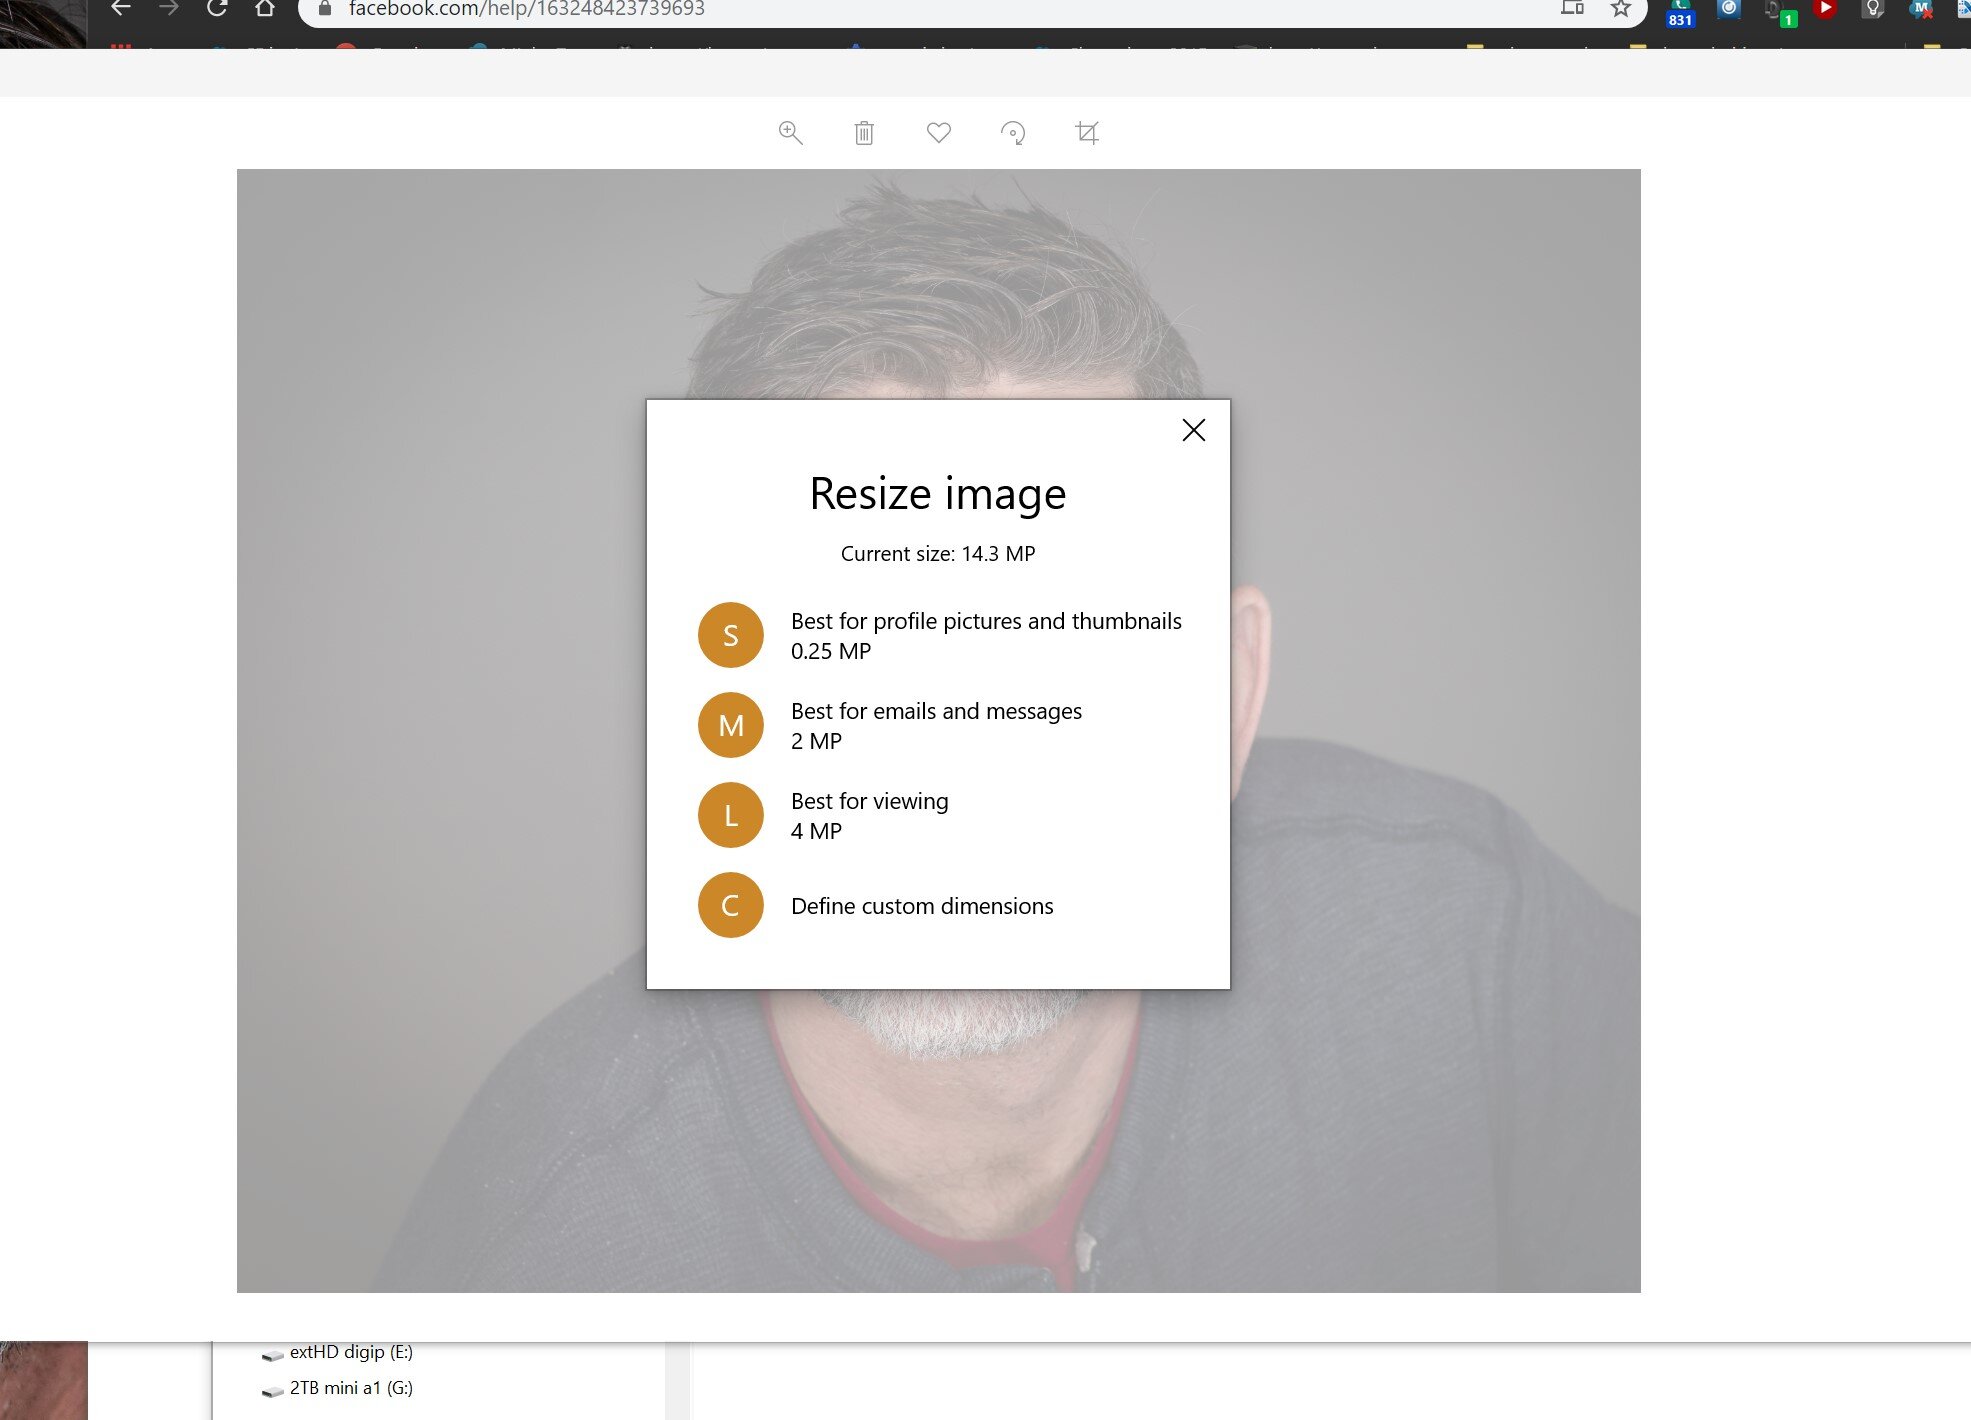
5. For the best results in uploading your image to your preferred sites like Linkedin, click on L For best viewing.
6. IF you have a request for a certain size, click on C and enter your custom dimensions.
7. Save file
How to resize your image on a Macintosh.
1. Find your image, open in Preview
2. In the menu, click on tools and scroll to resize
3. Enter your dimensions, (if you don’t know, enter 2500 for the long side)

4. Now under Menu, File then Export to your preferred place on your computer. Facebook Instructions New Facebook
1. Click your profile picture in the top right.
2. Click next to your profile picture.
3. Choose a photo or add a frame.
4. Crop your photo and click Save.
If you don't want to crop your photo, click Skip Cropping in the bottom left, then click Save. Classic Facebook 1. From your News Feed, click your name in the top left and hover over your profile picture. 2. Click Update. 3. Choose a photo or add a frame. 4. Crop your photo and click Save. If you don't want to crop your photo, click Skip Cropping in the bottom left, then click Save. For best quality, your profile picture should be at least 320 pixels wide and 320 pixels tall.
Here are the requirements for Linkedin.
1. Maximum file size is 8MB.
2. Profile photo: Pixel size is between 400 (w) x 400 (h) pixels and 7680 (w) x 4320 (h) pixels. We recommend adding a photo that won't require much cropping. You can adjust the photo after it has been uploaded.
3. Background photo: Recommended pixel dimensions are 1584 (w) x 396 (h) pixels. Learn more about adding or editing background photos.
4. File type must be PNG or JPG. Note: We don’t support GIFs. Instagram: